How to Animate Your Vector Illustrations with Adobe Animate and Illustrator
Today we’re going to talk a little about digital animation, starting with the basics. With this tutorial and others that will follow, I’d like to create small and simple animations of vector illustrations made in Adobe Illustrator, thus providing a starting foundation for anyone who has never ventured into this field.
To animate my vector illustrations, I use Adobe Animate (formerly Adobe Flash), which allows you to create animations while keeping them in vector format, and then export them in different video formats and even different sizes without loss of quality. There are many digital animation software options, including very complex ones, but to start, I think Animate is relatively simple and allows you to acquire the basic concepts that are also found in other more advanced software.
Frame-by-Frame Digital Animation
What we will look at today concerns the simplest type of animation, called ‘frame-by-frame’; it recalls the old cartoon animation techniques when the various frames (instances of the animation) were drawn one by one, each with a small difference (different poses, object movements, color changes, …).
To make a subject’s hand move, for example, the same subject was drawn and traced onto transparencies in the same pose, but with the hand positioned slightly differently in each step. To achieve smooth movements, many drawings with different poses had to be created, tracing the previous pose and modifying the position with small variations. There were many steps.
Now, with digital technologies, it is possible to speed up the creation of movements using specific techniques such as ‘motion tweens.’
In the next tutorials, I will explain other types of digital animation that can be used in Adobe Animate but also in other software; even with Photoshop, you can make the same simple animations that we will see today and in the upcoming tutorials. The other two types of animation after the ‘frame-by-frame’ method are: ‘motion tween‘ and ‘shape tween.’
The first, as the name suggests, is useful when we want to make an object move, and the second when we want to make an object change shape or color.
The same shape and color animations can clearly be done simply with frame-by-frame animation, but the tweening speeds up these processes.
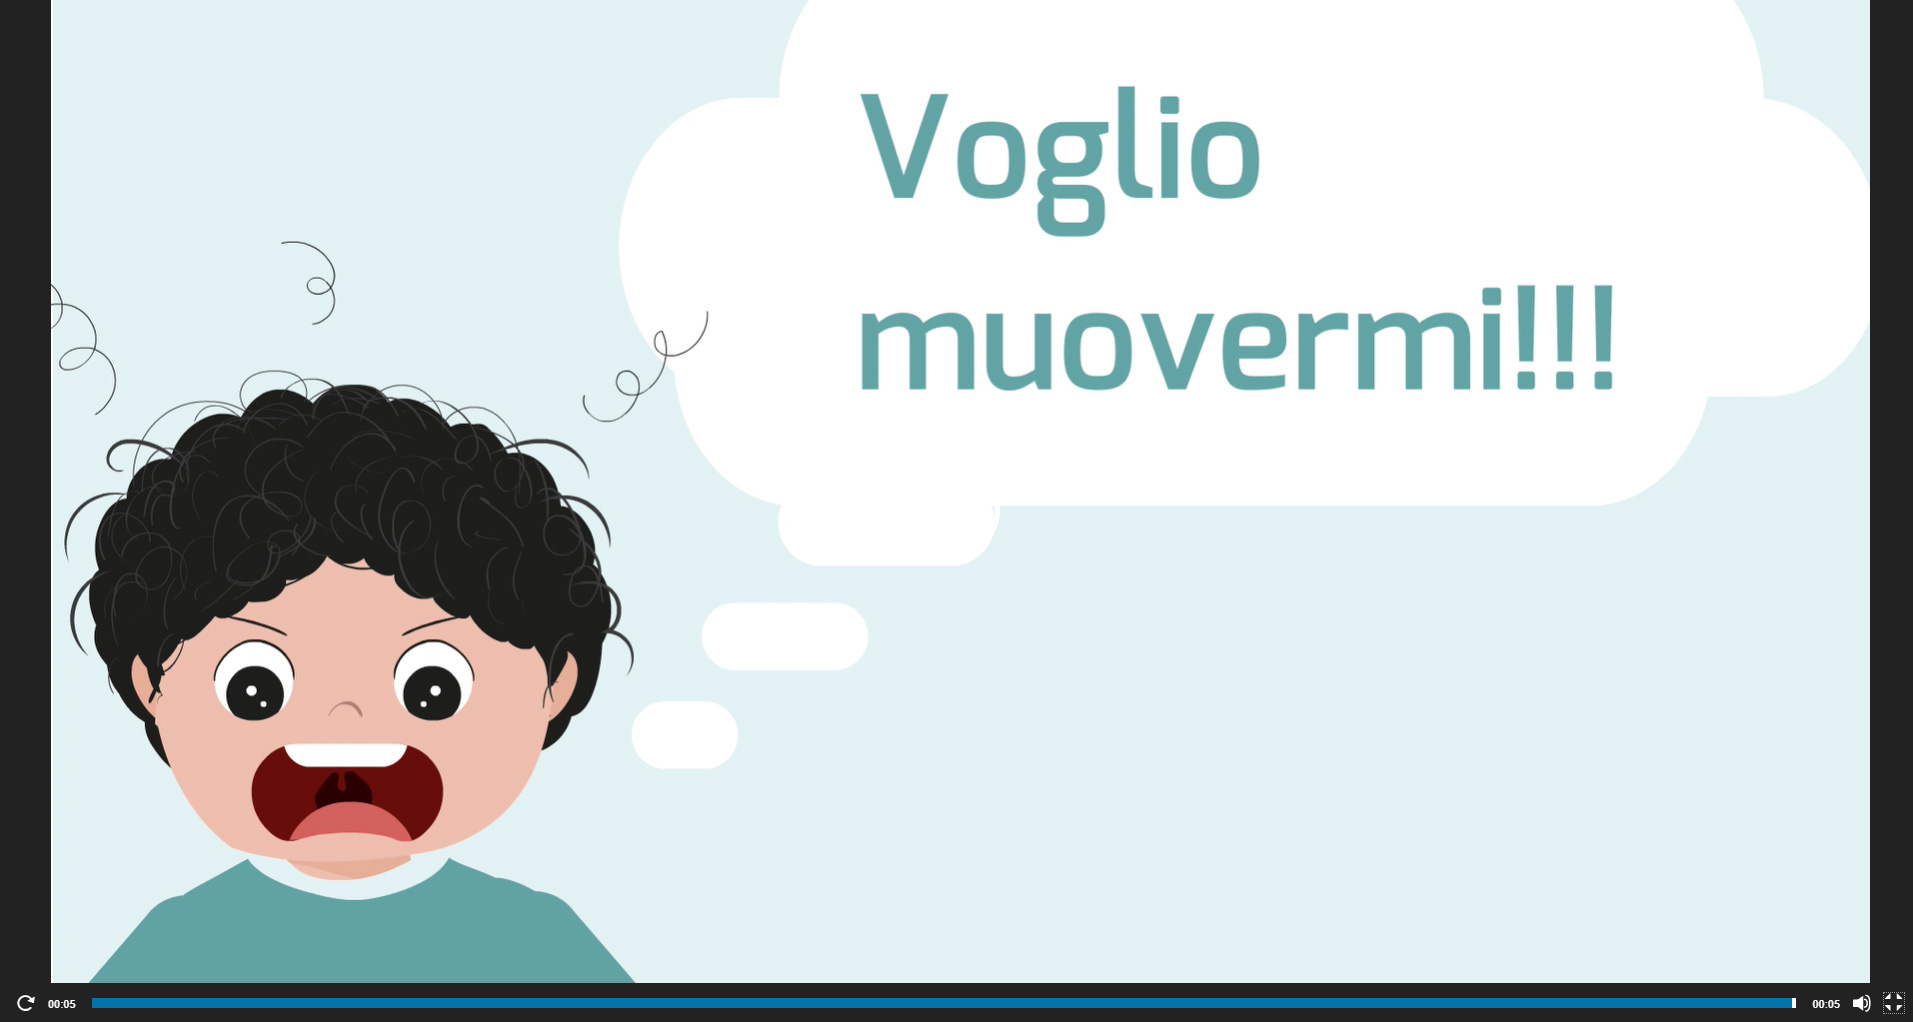
I’ll start by showing you what the final animation we will create today will look like.
Vector animations
Adobe Animate is entirely vector-based, so it is possible to draw objects directly within it using very fast drawing tools. However, today I want to show you the exchange method between Adobe Illustrator and Animate; it is very easy to export the drawings created with Illustrator using a simple copy-paste, thus speeding up the work.
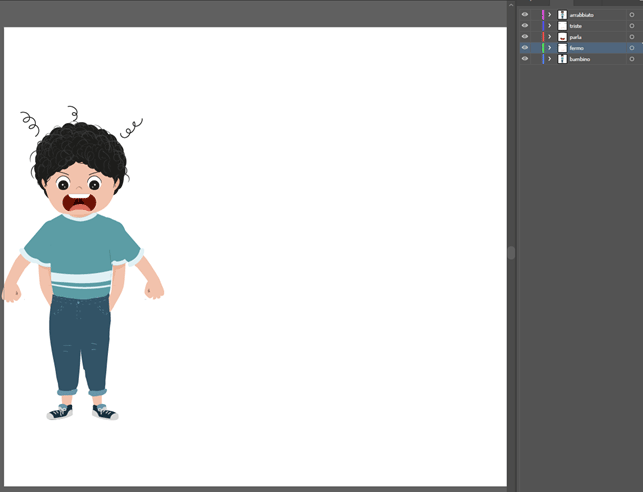
I also planned to export the different layers, so I created the subject’s different poses on different layers to speed up the work in Animate.
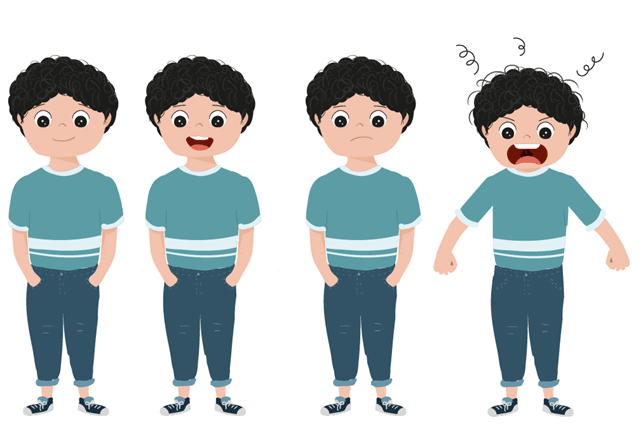
Since this is a first basic tutorial, I want to start with a simple animation, so I have synthesized the steps to make the child talk and get angry into just 4 poses. To simplify the tutorial, I only modified the eyebrows and mouth in the poses, as they immediately convey the expressions, but I could have modified the eyes and the rest as well.
Design the Storyboard
Before starting to work in Adobe Animate, I advise you to create a small storyboard, even if just sketched, outlining the main scenes: this will help you decide in advance what the composition of the scene will be (where the characters, other elements, and the setting will be placed) and how the salient transitions between one scene and the next will occur during the animation.
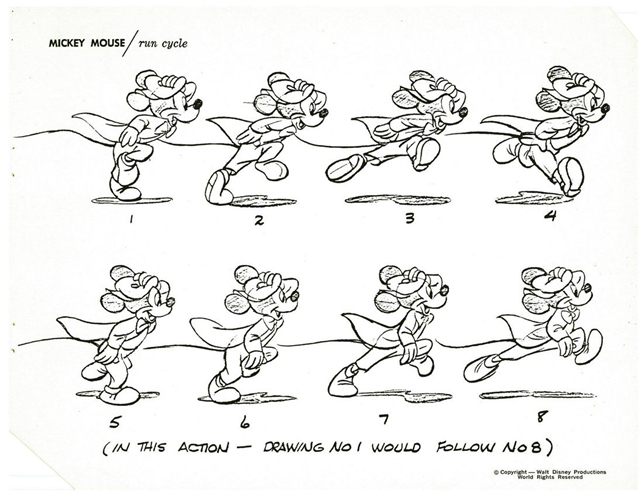
Like in the case of the Disney drawing I showed you earlier.
Clearly, after some practice, for such short and simple animations, you will surely already have the storyboard in mind and won’t need to draw it; but I recommend, at least initially, drawing it out on paper.
When you have finished, you will have practically already outlined most of the main frames.
Work with Adobe Animate and Illustrator
Since we can export all the layers exactly as they are positioned in Illustrator, I separated the various poses into the corresponding number of layers.”
In this way, I can find the correct positions for the eyes and mouth already aligned with the rest and in different expressions on individual layers within Animate.
At this point, with all layers visible, I select everything and copy (CTRL + C).
I open Animate, create a new document in Full HD format, and paste: the result will be the placement of the objects on the various layers, already named as in Illustrator and already perfectly overlapped.
They all remain selected, so I use the resizing tool to enlarge everything and immediately position it in the final spot. It is important to establish the final positions and dimensions right away; it is always possible to change them, but after creating the animation steps, it would become longer and more complicated because we would have to modify every single frame.
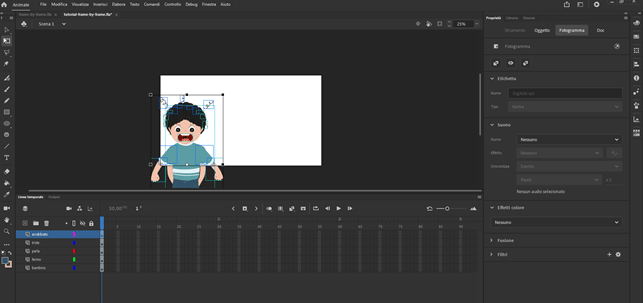
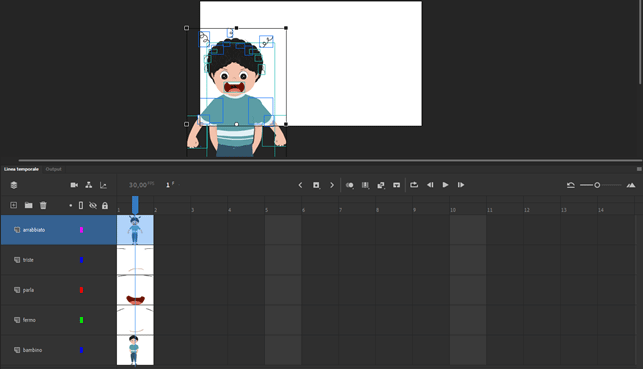
Now we are inside Animate with our ‘stage‘ (the white area) called the ‘Scene‘ or ‘Stage.’ Below, you’ll find the Timeline, which shows the temporal progression of the animation.
The Timeline and Frames
We can view the timeline as it is, by default, or with a small preview which might be useful in the beginning to get familiar with it. The preview displays the drawing present in the frame on the respective layer, just like before in the steps of Mickey Mouse’s run.”
There are various types of frames:
-
Keyframes
-
Normal frames (static)
-
Empty keyframes
-
Empty frames (static)
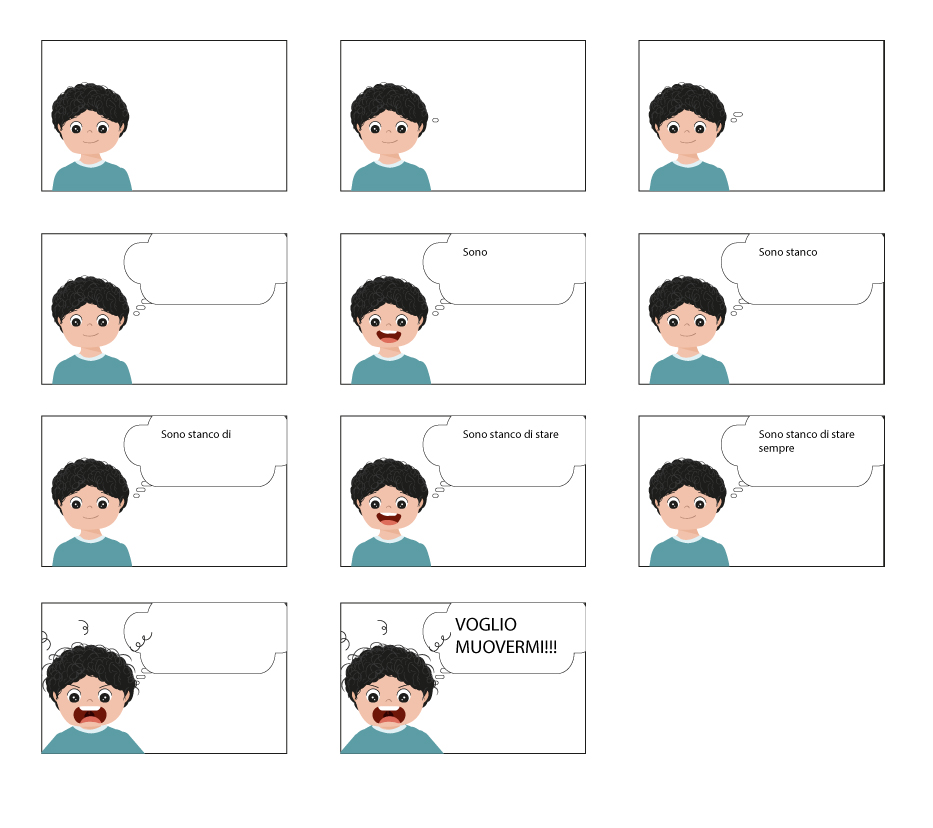
You will need to insert keyframes when you want something to change in the scene (position, color, visibility, etc.); from that moment on, something different from before will be displayed on that specific layer. In our specific case, in a keyframe following the first one, I will show the talking mouth instead of the closed mouth, so I will need to insert a keyframe. Instead, the stationary child on the underlying layer and the background color will remain static for a while, so on those layers, I will insert normal frames.
How to Insert Different Types of Frames
To insert different types of frames, you can use the pop-up menu by right-clicking on a specific frame in the timeline or by using ‘F5’ (‘normal’ frame), ‘F6’ (keyframe), ‘F7’ (empty keyframe). The empty keyframe indicates that something is changing since it is ‘key,’ but at the same time, it empties the layer at that point, and consequently, the content of the layer will disappear from the scene.
It will therefore be a matter of inserting keyframes where needed (this is why the storyboard you created at the beginning will be useful), then placing the elements you want to be displayed at that precise moment in the white area (the scene).
To better explain how to proceed with the animation, I recommend watching the video you find below on YouTube.
As I also show in the video, for this tutorial, I used a fairly simple and stylized illustration, but we can also use more complex vector illustrations created with more artistic brushes, gradients, and more.
Watch the video at the bottom of the page to see the complete digital animation creation process, and if you have any doubts or questions, write to me in the comments.
If you want to use my illustration to complete the tutorial, you can find it here: bambino-espressioni.zip (2963 downloads )
If you instead want to see how I create my vector illustrations from sketch to coloring, read this article: From Sketch to Final Vector Illustration with Adobe Illustrator Tools
Happy work and, as always, have fun!


Want to stay updated on upcoming articles? Follow me on social media