From Paper Sketch to Traced Vector Drawing
To go from sketch to final vector illustration with Adobe Illustrator, I often use the ‘Pencil Tool’ and the ‘Shape Builder Tool’ and ‘Live Paint Bucket’ tools. When dealing with illustrations that have a clean and geometric style, I do not use the ‘Image Trace Tool,’ as I did in other tutorials, because you cannot achieve precise geometric shapes.
If you have a graphic tablet (even a very simple one) and you use the options I explain below, the ‘Pencil Tool’ is much faster than the ‘Pen Tool.’
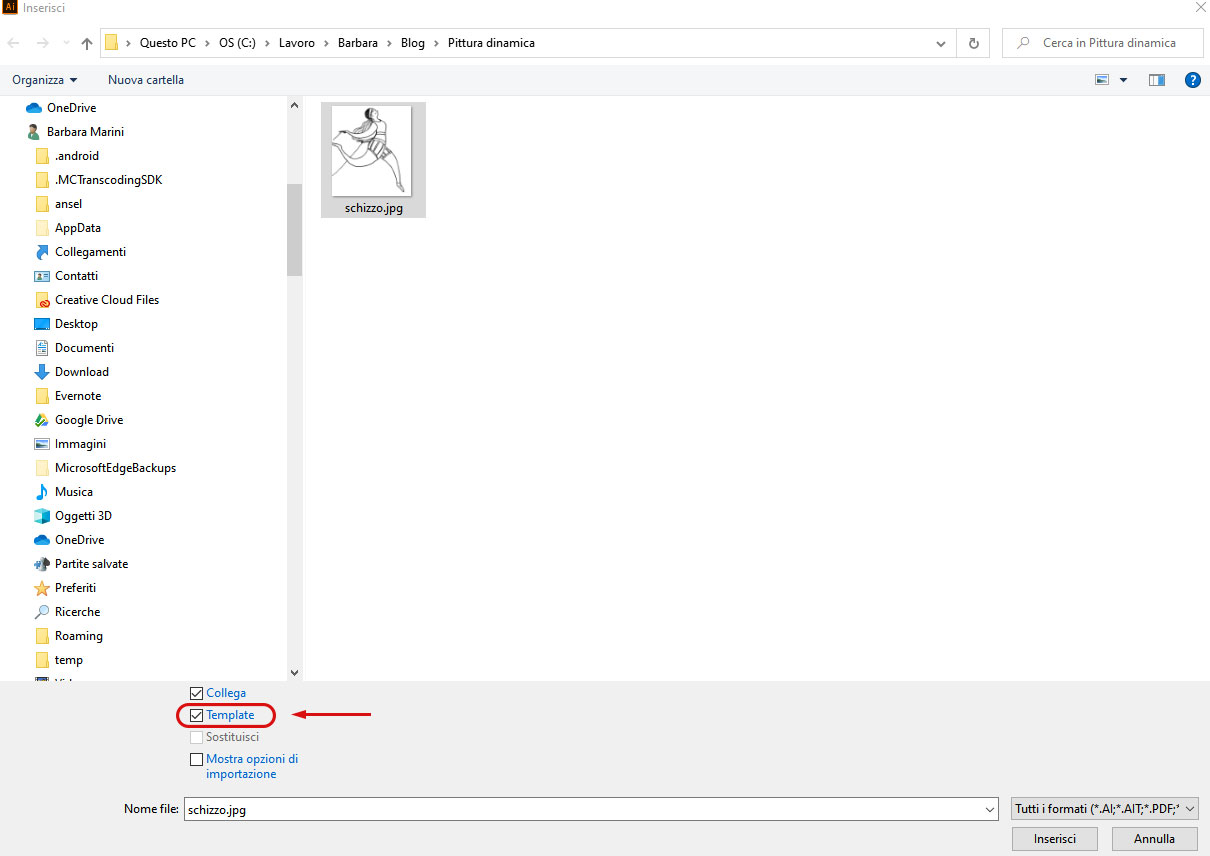
I first create the initial sketch on paper with pencils or ink. After digitizing it, I insert it into an Illustrator artboard using the ‘Template’ option. In this way, the image is automatically placed on a Template Layer, which has 50% opacity and is locked. Illustrator then creates a layer above the tracing (template) layer where you can draw.
Drawing with the “Pencil Tool”
To trace the drawing, I use the ‘Pencil Tool’ instead of the ‘Pen Tool’ because it allows me to be faster when using the graphic pen.
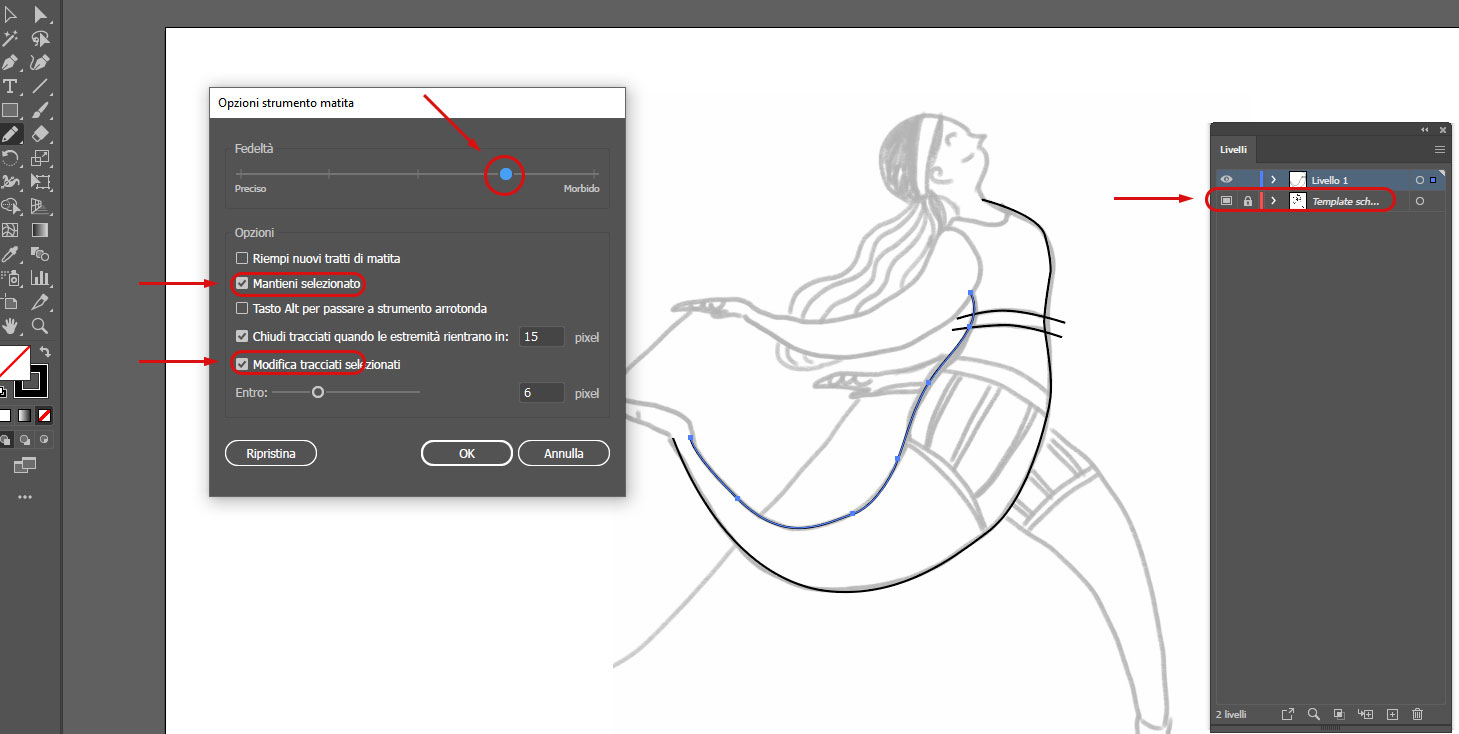
In the ‘Pencil Tool’ options, which can be opened by double-clicking on the tool, you can select or deselect the options circled in red in the image:
-
-
‘Keep Selected’: allows you to keep the newly created path selected, so the drawing of every new path will be connected to the previous one, creating a continuous line.
-
-
‘Edit Selected Paths’: allows you to re-trace over a part of the selected path to correct it, without having to manually delete and modify anchors and curves.
- The ‘Fidelity’ slider allows you to modulate the modeling intervention that Illustrator performs while we draw to make our stroke smoother, but at the expense of precision/fidelity: for this specific type of very clean illustration with few angles, it is better to use a ‘smoother’ value.
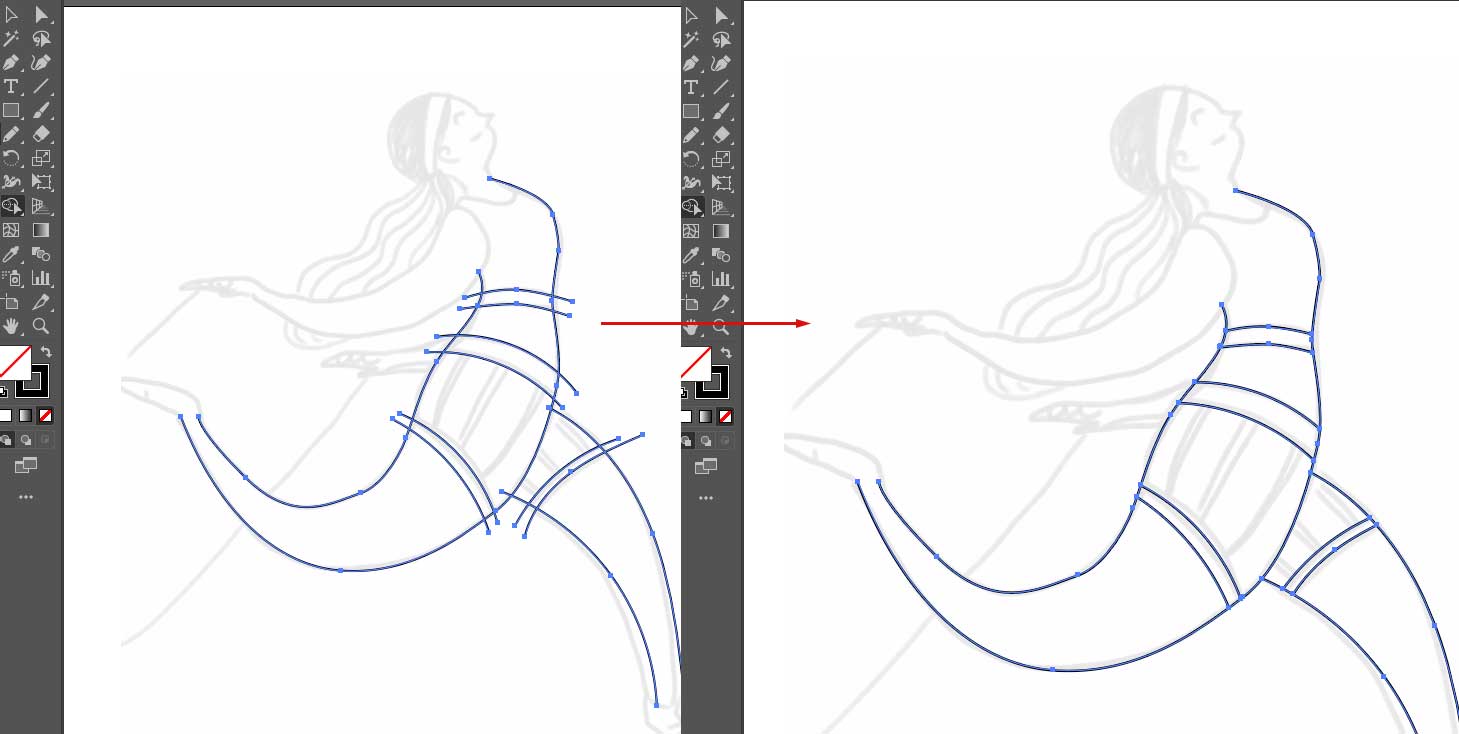
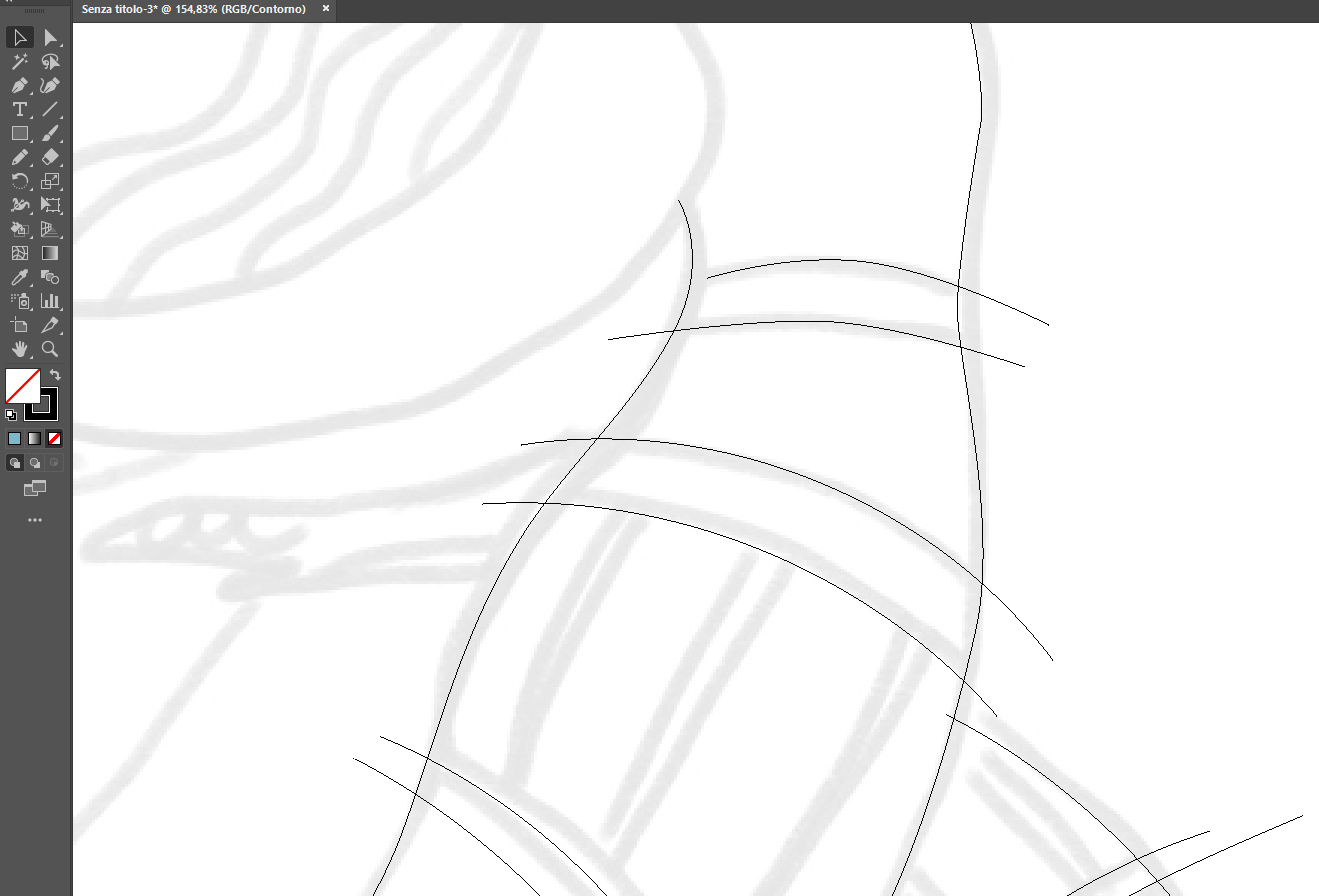
As you can see from the images, I kept the paths longer than necessary so that they intersect well with the other lines: I will cut the superfluous parts later. However, in this way, I ensure that the paths connect perfectly, without open gaps: thus, with the subsequent ‘Live Paint Bucket’ tool, I can easily create solid colored areas.
Refining the Sketch with the “Shape Builder Tool”
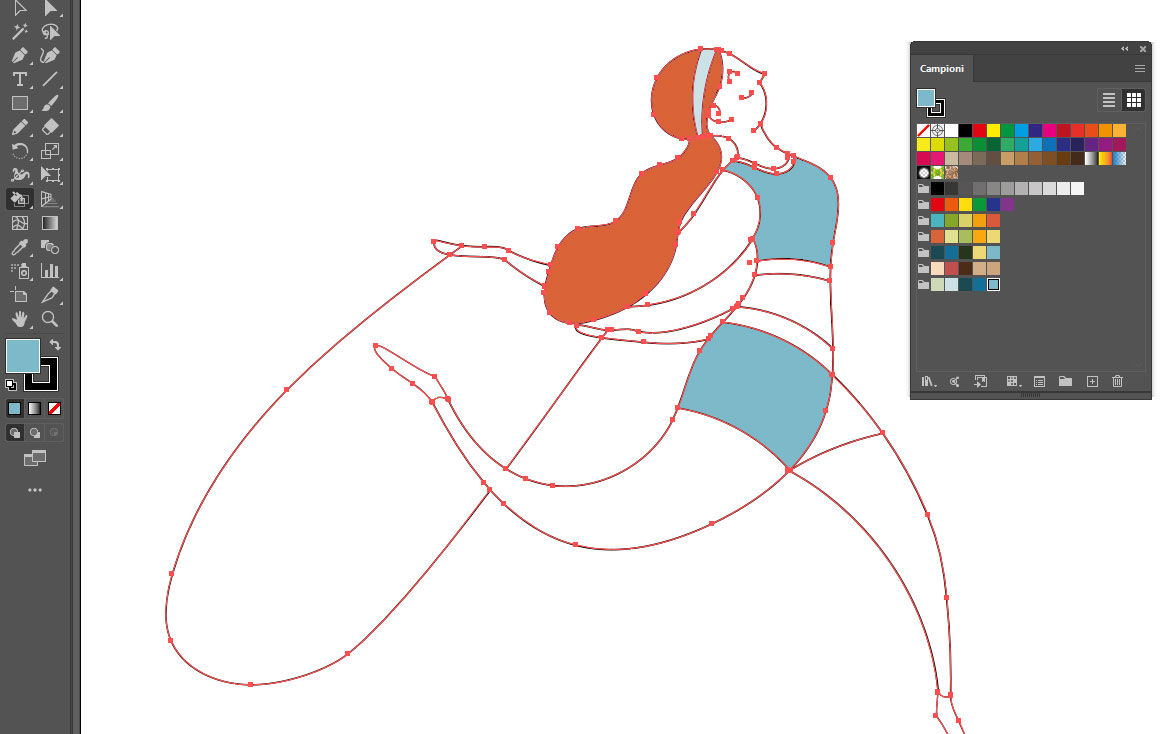
Once the outline of a part of the illustration is drawn, I proceed with the ‘Shape Builder Tool’ to refine the sketch and eliminate the superfluous path segments. After selecting all the paths, use the ‘Shape Builder Tool’ and, while holding down the ALT key, click on the path segments you want to eliminate.
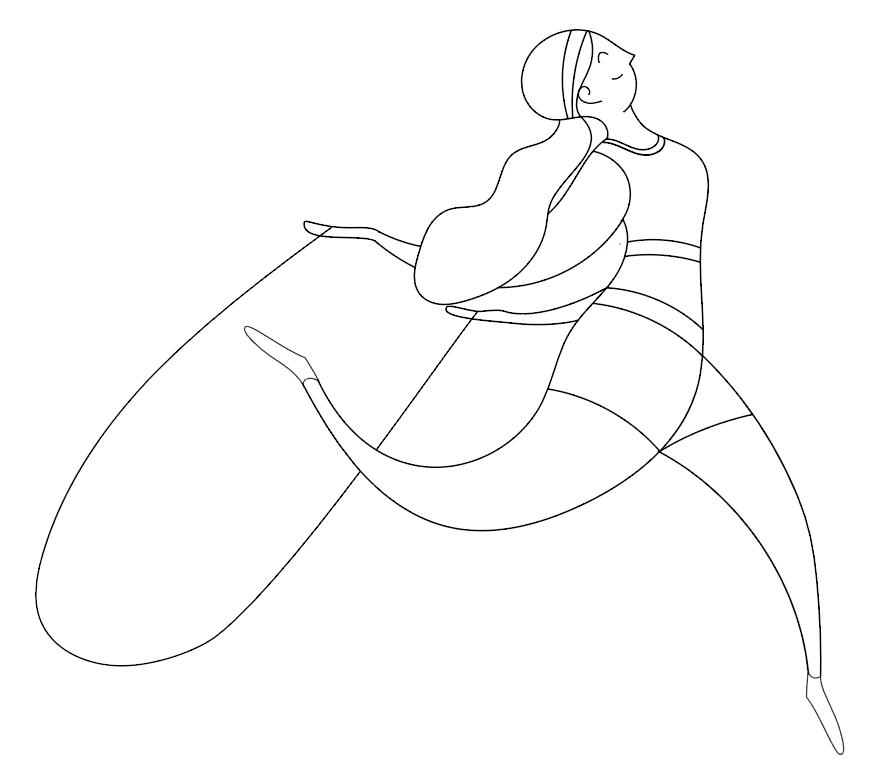
We thus arrive at having the complete outline of the drawing.
Coloring the Vector Illustration with the “Live Paint Bucket Tool”
Select all the paths and use the “Live Paint Bucket Tool” to color the various shapes. This tool recognizes areas bounded by paths, even if they are not closed shapes, and transforms them into closed, colored shapes with the chosen fill color.
Simply choose a color from the Swatches panel and click with the bucket inside the area that will be highlighted when the mouse passes over it. If it doesn’t work in certain places, the paths are probably not touching perfectly.
You can check the various intersections by using CTRL + Y to view the path structure in “Outline” mode and extend the ends of the paths that are not touching.
With just a few clicks, we manage to obtain the completely colored vector illustration! 🙂
The ‘Live Paint Bucket Tool’ automatically creates a group with the objects you selected before coloring. To get the individual shapes at the end of the coloring process, click the ‘Expand’ button in the ‘Properties’ panel.
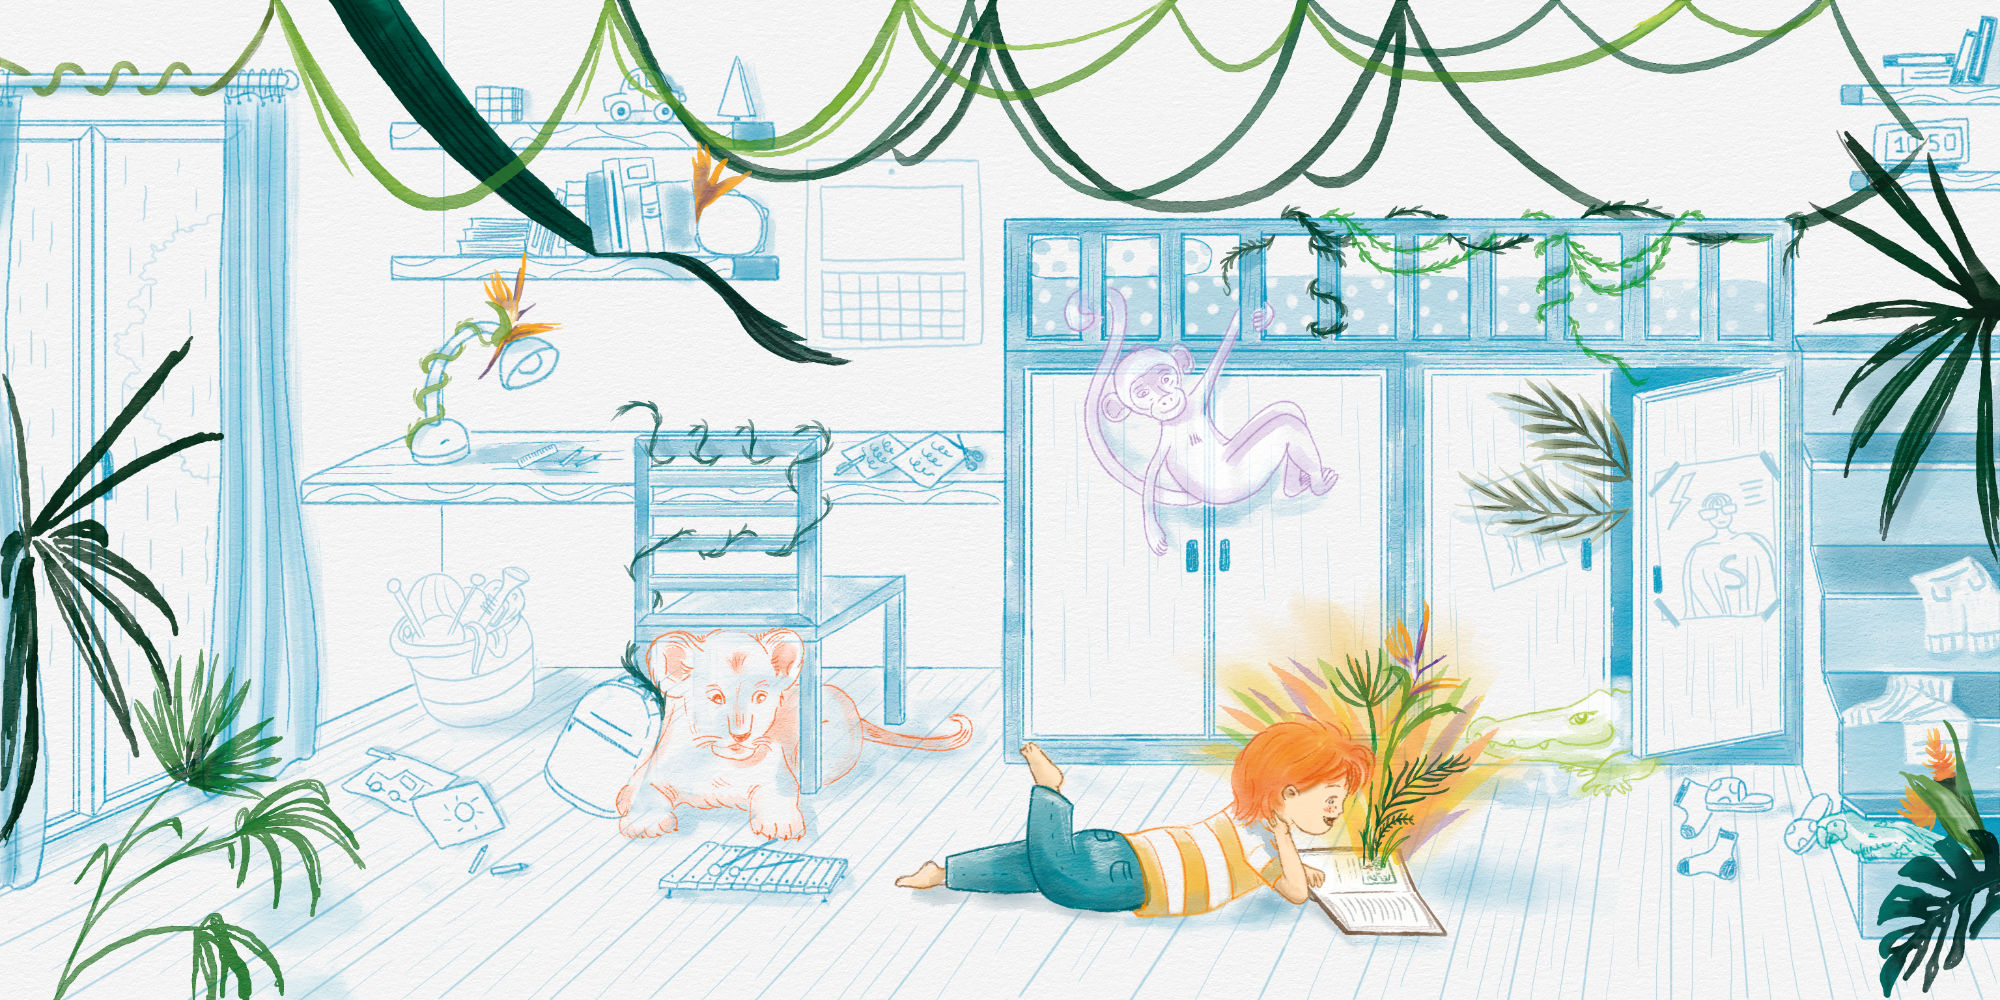
You can leave the vector illustration clean and geometric, or you can add details with artistic brushes (see tutorial and download my set of artistic brushes) or textures (I will soon create a tutorial on this topic) to achieve a different style.

If you want to try creating color proofs on your finished illustration, read this other article: ‘Create color variations with Recolor Artwork in Adobe Illustrator’
From Paper Sketch to Traced Vector Drawing
To go from sketch to final vector illustration with Adobe Illustrator, I often use the ‘Pencil Tool’ and the ‘Shape Builder Tool’ and ‘Live Paint Bucket’ tools. When dealing with illustrations that have a clean and geometric style, I do not use the ‘Image Trace Tool,’ as I did in other tutorials, because you cannot achieve precise geometric shapes.
If you have a graphic tablet (even a very simple one) and you use the options I explain below, the ‘Pencil Tool’ is much faster than the ‘Pen Tool.’
I first create the initial sketch on paper with pencils or ink. After digitizing it, I insert it into an Illustrator artboard using the ‘Template’ option. In this way, the image is automatically placed on a Template Layer, which has 50% opacity and is locked. Illustrator then creates a layer above the tracing (template) layer where you can draw.
Drawing with the “Pencil Tool”
To trace the drawing, I use the ‘Pencil Tool’ instead of the ‘Pen Tool’ because it allows me to be faster when using the graphic pen.
In the ‘Pencil Tool’ options, which can be opened by double-clicking on the tool, you can select or deselect the options circled in red in the image:
-
-
‘Keep Selected’: allows you to keep the newly created path selected, so the drawing of every new path will be connected to the previous one, creating a continuous line.
-
-
‘Edit Selected Paths’: allows you to re-trace over a part of the selected path to correct it, without having to manually delete and modify anchors and curves.
- The ‘Fidelity’ slider allows you to modulate the modeling intervention that Illustrator performs while we draw to make our stroke smoother, but at the expense of precision/fidelity: for this specific type of very clean illustration with few angles, it is better to use a ‘smoother’ value.
As you can see from the images, I kept the paths longer than necessary so that they intersect well with the other lines: I will cut the superfluous parts later. However, in this way, I ensure that the paths connect perfectly, without open gaps: thus, with the subsequent ‘Live Paint Bucket’ tool, I can easily create solid colored areas.
Refining the Sketch with the “Shape Builder Tool”
Once the outline of a part of the illustration is drawn, I proceed with the ‘Shape Builder Tool’ to refine the sketch and eliminate the superfluous path segments. After selecting all the paths, use the ‘Shape Builder Tool’ and, while holding down the ALT key, click on the path segments you want to eliminate.
We thus arrive at having the complete outline of the drawing.
Coloring the Vector Illustration with the “Live Paint Bucket Tool”
Select all the paths and use the “Live Paint Bucket Tool” to color the various shapes. This tool recognizes areas bounded by paths, even if they are not closed shapes, and transforms them into closed, colored shapes with the chosen fill color.
Simply choose a color from the Swatches panel and click with the bucket inside the area that will be highlighted when the mouse passes over it. If it doesn’t work in certain places, the paths are probably not touching perfectly.
You can check the various intersections by using CTRL + Y to view the path structure in “Outline” mode and extend the ends of the paths that are not touching.
With just a few clicks, we manage to obtain the completely colored vector illustration! 🙂
The ‘Live Paint Bucket Tool’ automatically creates a group with the objects you selected before coloring. To get the individual shapes at the end of the coloring process, click the ‘Expand’ button in the ‘Properties’ panel.
You can leave the vector illustration clean and geometric, or you can add details with artistic brushes (see tutorial and download my set of artistic brushes) or textures (I will soon create a tutorial on this topic) to achieve a different style.
If you want to try creating color proofs on your finished illustration, read this other article: ‘Create color variations with Recolor Artwork in Adobe Illustrator’
https://helpx.adobe.com/it/illustrator/using/creating-shapes-shape-builder-tool.html
https://helpx.adobe.com/it/illustrator/using/live-paint-groups.html
Watch the video with all the tutorial steps below
–
–


Leave A Comment