Vector textures allow you to add custom shadows or fills to your illustrations.
Custom shadows and fills using vector textures
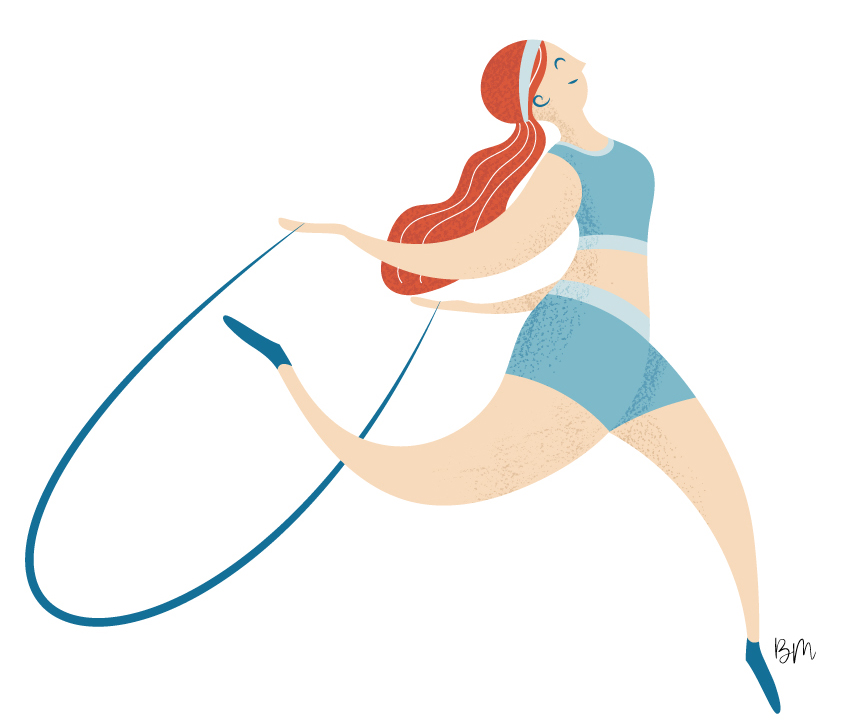
In this article, I’ll explain how I created the shading in the illustration you see below, starting from pencil gradients drawn on paper using pencils of different hardness (from 4H to 6B) and varying pressure levels.
If you want to see how I created this illustration using the Shape Builder and Live Paint Bucket tools, check out the previous article: From Sketch to Final Vector Illustration with Adobe Illustrator Tools.
Create the different pencil shading on paper
Using pencils of varying hardness and adjusting the pressure gradually, create several gradients with different intensities, as shown in the image below.
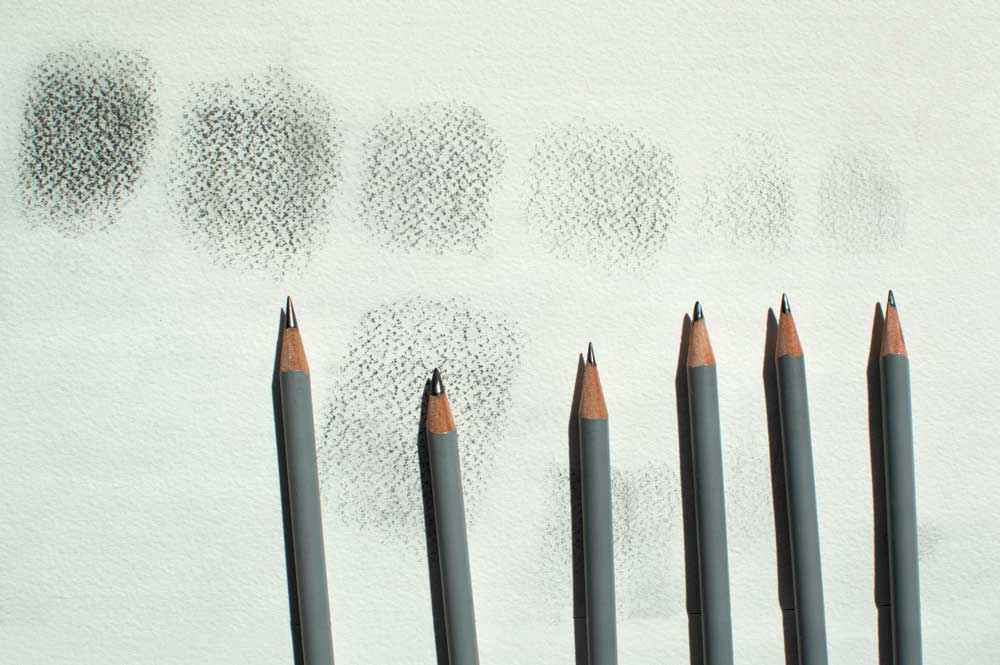
I used a rough, heavy-grain paper to achieve a more irregular and contrasted texture.
I tried to keep the outer areas of each shading lighter and softer: this way, I’ll later be able to duplicate the texture and place the copies close to each other, slightly overlapping them while maintaining a uniform color intensity.
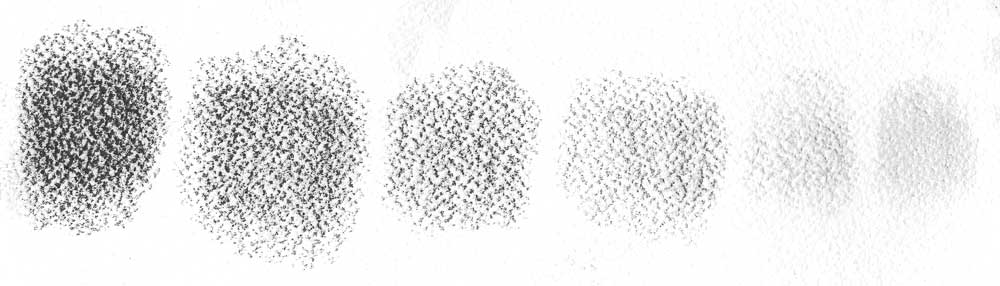
At this point, you can digitize the sheet and open the scan in Photoshop. Use the Levels adjustment to lighten the white of the paper and bring out the pencil shading. If you want to see how to do this, check out this article.
Place the digitized image into Illustrator
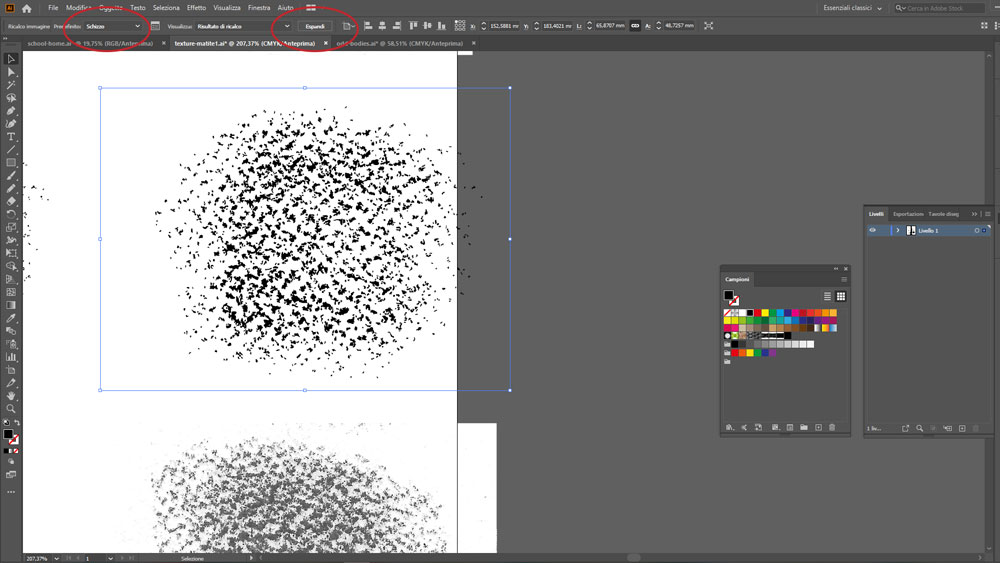
Now you can import each scanned texture into a new Adobe Illustrator document.
You can crop the individual textures in Adobe Photoshop, saving each as a separate image file. Alternatively, you can import the entire digitized image into Illustrator and crop it later using the “Crop Image” tool after duplicating it.
Convert the images into vector textures
Use the Image Trace command to convert the pencil strokes of your shading into vector paths. In this case, I used the “Sketch” preset, which converts everything to a single color and removes the white background. You can experiment with other presets and further customize the conversion using the “Threshold” and “Paths” sliders. For more details, check out my tutorial on how to create vector shapes from watercolor drawings.
After using Image Trace, remember to click the Expand button to obtain editable paths so that you can color them individually with your desired colors.
Add vector textures to your illustrations
Now, to apply the textures you’ve created to the different shapes in your vector illustration, whether as shadows or fills, you’ll need to create a clipping mask.
In my experience, the fastest way is to copy (CTRL + C) the texture you want, select the shape where you want to place it, and then use the “Draw Inside” mode to paste (CTRL + V) the texture directly inside the selected shape.
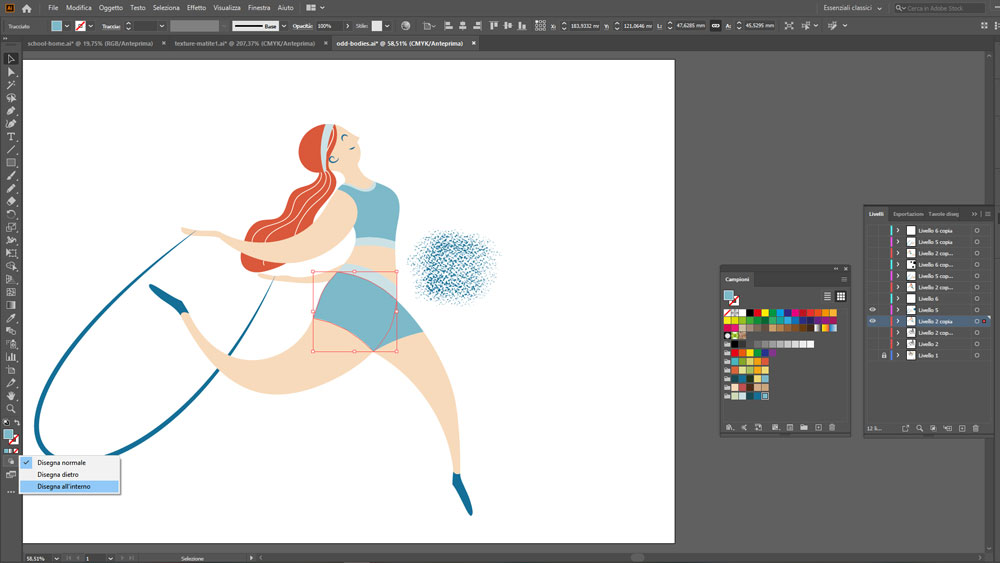
Illustrator automatically creates a clipping mask based on the selected shape; the mask hides the parts of the texture that extend beyond the shape’s edges. Finally, select “Draw Normal” again to return to the standard drawing mode.
If you want to download for free the textures I created for this illustration, you can find them here.
If you have any questions, leave me a comment. See you soon!
Free download my vector texture
If you want to see them in action, watch the video tutorial below.
.


Want to stay updated on upcoming articles? Follow me on social media