Why convert a drawing into vector format?
In my work, I often need to vectorize a hand-drawn illustration on paper. In graphic design, it is frequently necessary to have graphic elements, illustrations, or icons that can be transformed, resized, and reused across different media without any loss of quality. As I’ve explained on other pages of my website, vector digital format allows transformations without any loss of quality.
My passion for traditional drawing and painting tools sometimes conflicts with this necessity. Once a drawing is “fixed” on paper in a specific format, it becomes difficult to resize it or make its background transparent. To make the background of a hand-painted drawing transparent, and possibly turn it into a pattern, Photoshop can be used, as I explain in another blog article.
However, it is not always possible to scale an A4 painting up to a poster or much larger formats.
The alternative is to convert the drawing into vector format. While you might lose some of the subtle shading and nuances, you gain a highly versatile product that can also be used for logos, which need to adapt to both small and large formats and to different media such as print or web.
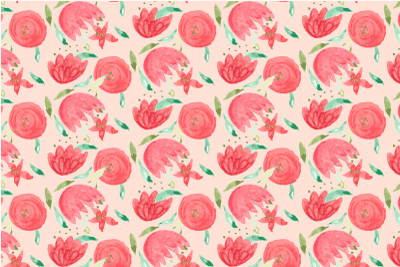
Here is an example of how I adapted one of my watercolor drawings for the creation of a logo.
![]()
On the left, the watercolor on paper; on the right, the vector logo.
Vectorizing a drawing also allowed me to define a precise color palette for the logo.
Once in vector format, the drawing can be used on any medium, of any size, and is easily adaptable for printing, whether offset, screen printing for gadgets, or other materials. One of my favorite applications is creating illustrations for children to be used on various merchandise and accessories.
Processing in Adobe Photoshop
Here are the recommended steps for any type of drawing, including pencil sketches, but especially suitable for colored drawings with multiple shades.
As always, you can watch the complete step-by-step process in the video on my YouTube channel.
First, digitize the drawing using a scanner and open it in Photoshop.
Use the Lasso Tool to separate the different colors and shapes onto separate layers.
If needed, use the Magic Wand Tool to remove the white background.
This way, you’ll have each individual element on separate transparent layers, ready for further processing.

Using the Photoshop file in Illustrator while keeping layers
At this point, after saving the file in Photoshop (.PSD) format, open Illustrator, create a new document, and place the file (File → Place), making sure to uncheck “Link” and selecting “Convert Layers to Objects” in the import options.
Now you can select the individual layers and edit them separately.
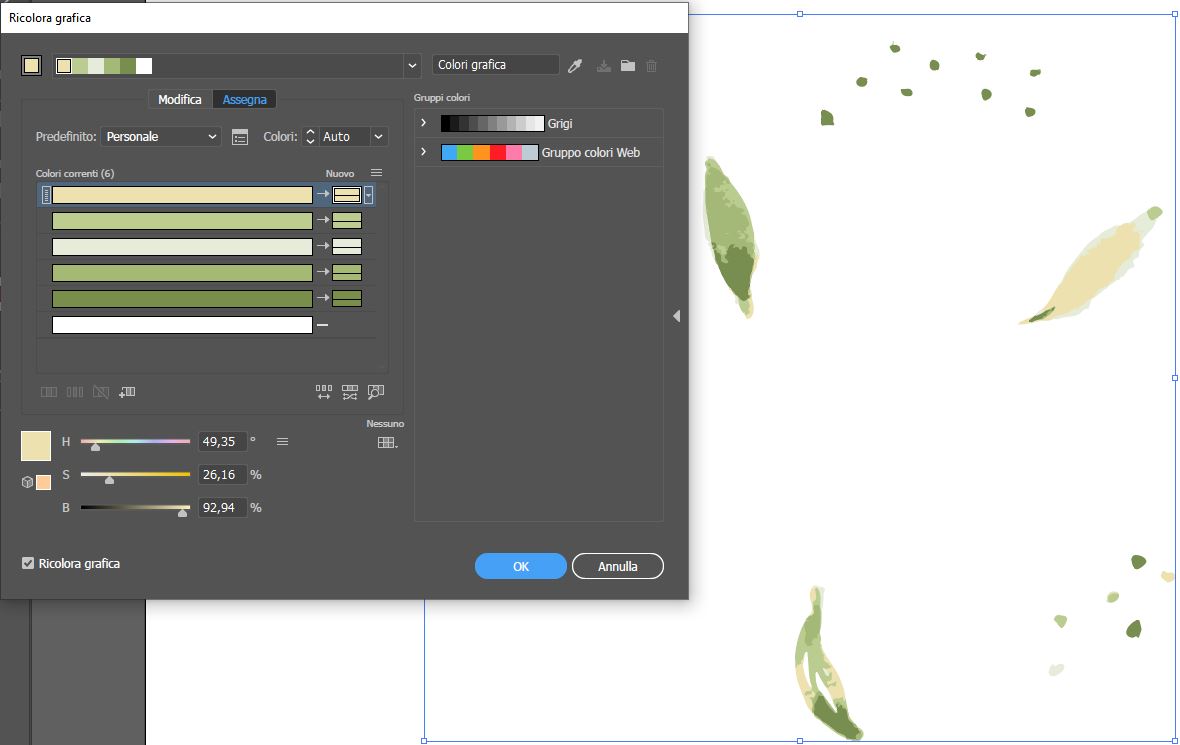
The Image Trace tool in Illustrator
Let’s start with the leaves. Select one of the two leaf layers and choose the command Image Trace → 6 Colors from the Properties panel or from the menu Object → Image Trace → Make.
Choose the 6 Colors profile because it provides a good number of color shades without generating too many complex shapes. That’s why in Photoshop we separated similar colors onto different layers.
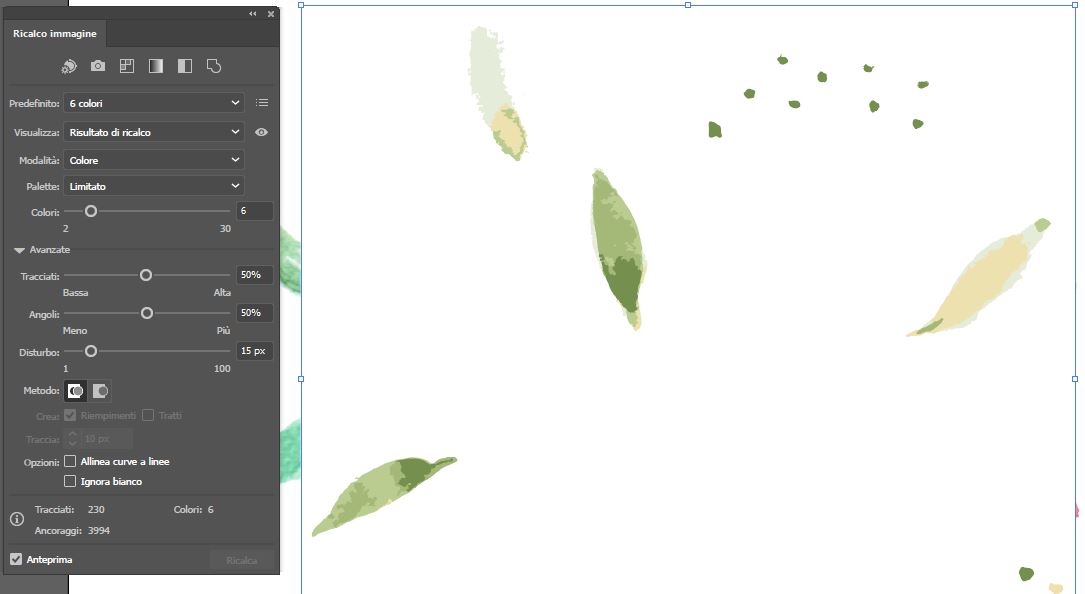
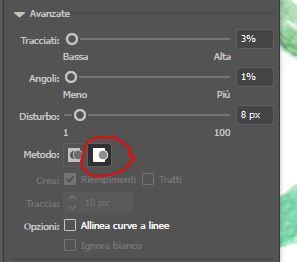
In the advanced options of the “Image Trace” panel, lower the values for Paths and Corners, setting them around 5% to make the shapes less complex. Also, select the Method: Overlapping icon so that the shapes overlap each other rather than just being adjacent.
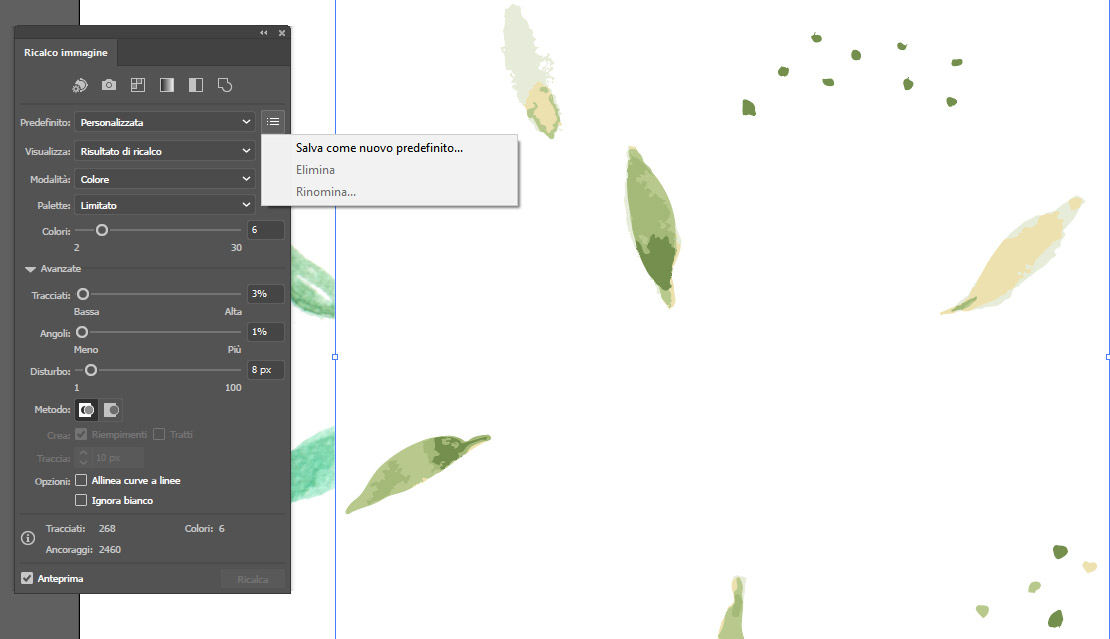
When you are satisfied with the result, I recommend saving the “Image Trace” panel settings as a custom preset so you can quickly reapply them if needed. I saved one called “Watercolor.”
Click the “Expand” button in the Properties panel to obtain the final vector shapes. Then ungroup the result to remove the white background.
At this point, if you want to clean up the shapes further and smooth them out, you can use the command Object → Path → Simplify, keeping the Curve Precision value high so as not to alter the paths too much.
If you want to optimize the colors instead, you can use the Recolor Artwork command, which allows you to adjust the colors contained in the selected shapes.
Perfect!
Now you need to repeat the same procedure for each layer, obtaining another group of vectors for the leaves and for each individual flower. If you saved your preset under the name Watercolor, as I explained above, instead of selecting “6 Colors”, choose Watercolor—this will quickly reapply the same settings used previously.
At the end of the process, you will have a series of vector shapes that you can use for logos, icons, patterns, and much more.


Watch the attached video showing all the individual steps of the tutorial, where you can see live how to vectorize a watercolor drawing. If you have any doubts or questions, feel free to write them in the comments.
Happy creating, and as always, have fun!


Want to stay updated on upcoming articles? Follow me on social media